Before installation
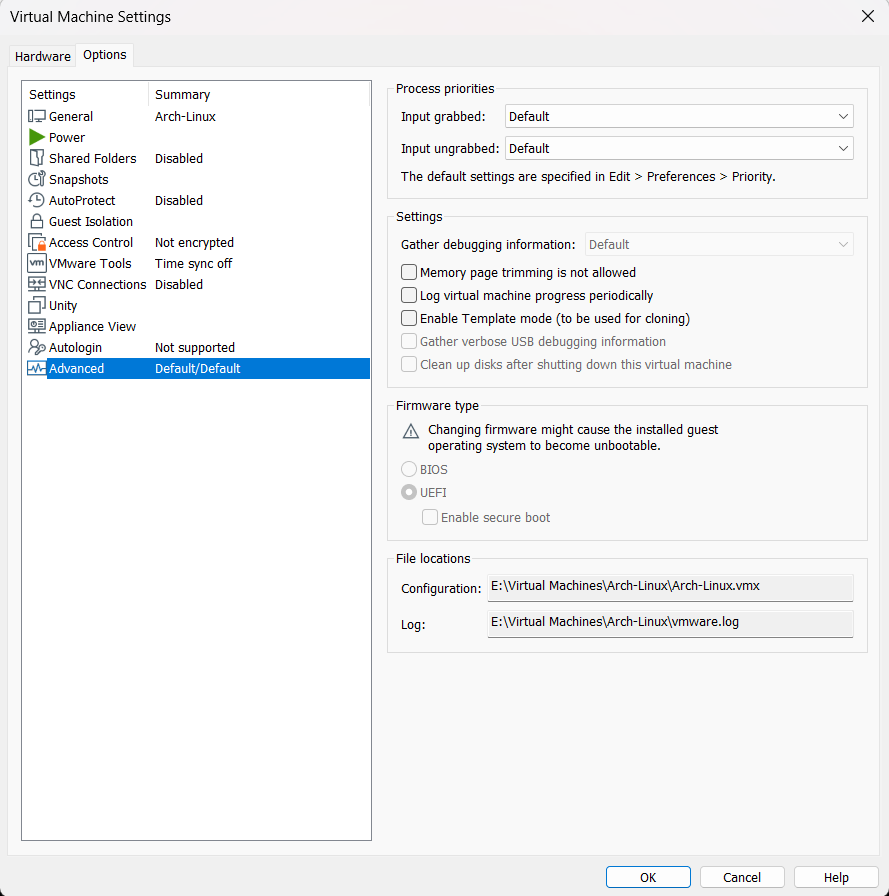
Create a virtual machine and adjust depend config on your need(Except for the UEFI firmware part):
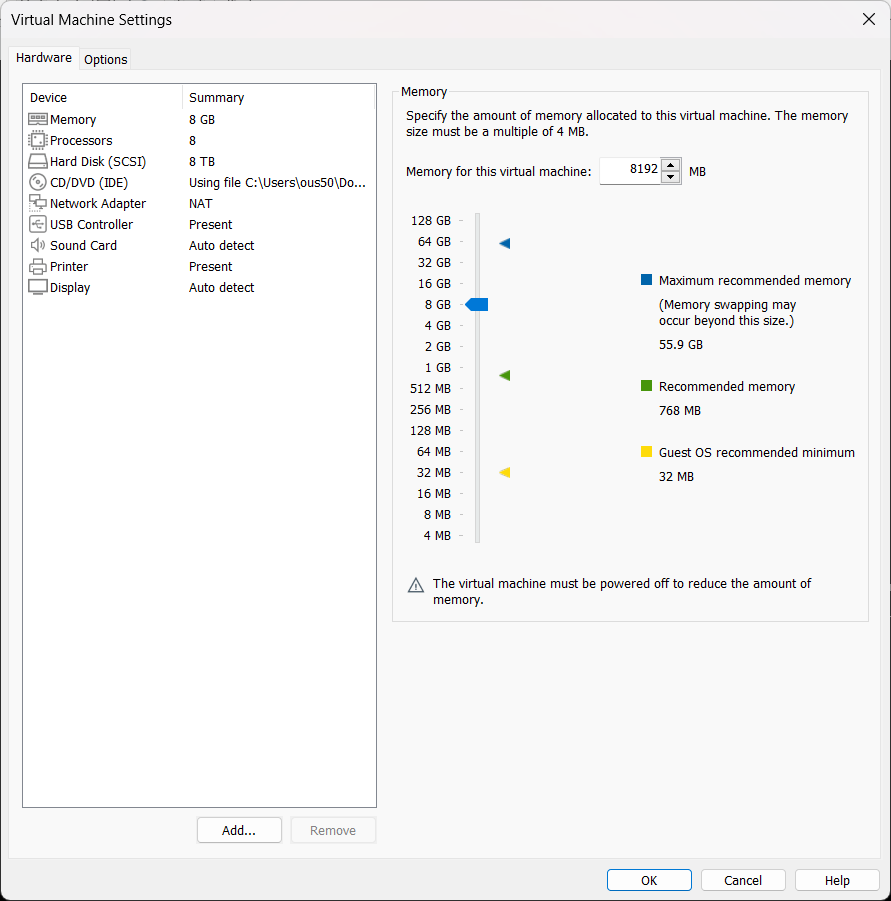
To prevent the creation of vmem files for acceleration, add the following lines to your .vmx file(:
prefvmx.minVmMemPct = "100"
MemTrimRate = "0"
mainMem.useNamedFile = "FALSE"
sched.mem.pshare.enable = "FALSE"
prefvmx.useRecommendedLockedMemSize = "TRUE"
Boot up the vm, and check if the firmware is UEFI or not:
ls /sys/firmware/efi/efivars
if it’s legacy BIOS, it will returns No such file or directory.
Partitioning
Create a new GPT partition table and partitioned with an EFI Partition no less than 300MiB and an Linux partition with cgdisk or any other partition tools you want to use:
cgdisk /dev/sda
Format partitions
EFI
mkfs.fat -F32 /dev/sda1
Root system
mkfs.btrfs -f -L Arch /dev/sda2
Building BTRFS subvolume
@:corresponding to/@home:corresponding to/home@cache:corresponding to/var/cache@docker:corresponding to/var/lib/docker@log:corresponding to/var/log
Enabling COW in @cache, @log is not needed.
- Mount root partition to
/mnt:
mount -t btrfs -o compress=lzo /dev/sda2 /mnt
Generally we lzo is good enough. Reports shows that btrfs is way slower even under Zstd:1, while lzo has nearly no difference compared with non-compressed.
- Create subvolumes:
btrfs subvol create /mnt/@
btrfs subvol create /mnt/@home
btrfs subvol create /mnt/@cache
btrfs subvol create /mnt/@docker
btrfs subvol create /mnt/@log
btrfs subvol create /mnt/@tmp
btrfs subvol create /mnt/@swap
# Use chattr to disable COW
chattr +C /mnt/@cache
chattr +C /mnt/@log
chattr +C /mnt/@swap
# Umount the partition
umount /mnt
Mount partitions and subvolumes
mount -o noatime,nodiratime,ssd,compress=lzo,subvol=@ /dev/sda2 /mnt
mkdir -p /mnt/{boot/efi,home,var/{log,lib/docker,cache},tmp,swap}
mount -o noatime,nodiratime,ssd,compress=lzo,subvol=@home /dev/sda2 /mnt/home
mount -o noatime,nodiratime,ssd,compress=lzo,subvol=@log /dev/sda2 /mnt/var/log
mount -o noatime,nodiratime,ssd,compress=lzo,subvol=@docker /dev/sda2 /mnt/var/lib/docker
mount -o noatime,nodiratime,ssd,compress=lzo,subvol=@cache /dev/sda2 /mnt/var/cache
mount -o noatime,nodiratime,ssd,compress=lzo,subvol=@tmp /dev/sda2 /mnt/tmp
mount -o noatime,nodiratime,ssd,compress=lzo,subvol=@swap /dev/sda2 /mnt/swap
Mount EFI partition:
mount /dev/sda1 /mnt/boot/EFI
Install the system
pacstrap /mnt base base-devel linux linux-firmware btrfs-progs networkmanager dhcpcd iwd vim sudo zsh zsh-completions {intel,amd}-ucode net-tools linux-headers curl git wget
Generate fstab
genfstab -U /mnt > /mnt/etc/fstab
Check again carefully after generation. Then proceed to post installation.
Post Installation
arch-chroot /mnt
Set mirror for pacman
Use reflector or just update /etc/pacman.d/mirrorlist, then apply changes via pacman -Syy.
Install bootloader
In this article we use grub as the bootloader, since it is one of a few bootloaders has a good support to btrfs.
pacman -S grub efibootmgr os-prober
grub-install --target=x86_64-efi --efi-directory=/boot/efi --bootloader-id=Arch
successful results is shown below.

Then do some optimization. Increase the log level and add nowatchdog param to accelerate the speed of booting and powering off:
nano /etc/default/grub
and edit as below:
- GRUB_CMDLINE_LINUX_DEFAULT= "loglevel=5"
+ GRUB_CMDLINE_LINUX_DEFAULT= "loglevel=5 nowatchdog"
Save it and then generate new grub config file to apply changes.
[root@archiso /] # grub—mkconfig —o /boot/grub/grub.cfg
Generating grub configuration file ...
Found linux image: /boot/vmlinuz-linux
Found initrd image: /boot/intel—ucode.img /bootzamd—ucode.img /boot/initramfs—linux.img
Found fal Iback initrd image(s) in /boot :
intel—ucode.img amd—ucode.img initramfs—linux—fallback.img
Warning: os—prober will not be executed to detect other bootable partitions.
Systems on them will not be added to the GRUB boot configuration.
Check documentation entry.
Adding boot menu entry for UEFI Firmware Settings ...
done
Set hostname and hosts
newHostname="Your-new-hostname"
echo $newHostname > /etc/hostname
echo -e "127.0.0.1   localhost\n" "::1         localhost\n" "127.0.1.1   $newHostname.localdomain $newHostname" >> /etc/hosts
Set Timezone
ln -sf /usr/share/zoneinfo/Asia/Hong_Kong /etc/localtime
Set locale
nano /etc/locale.gen
and uncomment en-US.UTF-8 UTF-8 and any locale you wanna to use, then generate locale and set en_US locale:
locale-gen && echo 'LANG=en_US.UTF-8' > /etc/locale.conf
Setting up user accounts
First set the root account password:
passwd root
yourName="example"
useradd -m $yourName && echo "Set a new password for the user $yourName" && passwd $yourName
Desktop Environment
In this article we install KDE:
pacman -S plasma plasma-wayland-session egl-wayland kde-{accessibility,graphics,multimedia,network,pim,sdk,system,utilities}-meta
VMware Tools
Arch Linux is not supported in the official VMware Tools. OpenVMTools is commonly used.
Using Open VM Tools one cannot resize the screeen properly. Here’s a solution following to a reddit post:
sudo pacman -Syu
sudo pacman -S open-vm-tools
sudo pacman -Su xf86-input-vmmouse xf86-video-vmware mesa gtk2 gtkmm
echo needs_root_rights=yes | sudo tee /etc/X11/Xwrapper.config
sudo systemctl enable --now vmtoolsd
And you are good to go.
Reference:
https://blog.zrlab.org/posts/arch-btrfs
https://ericclose.github.io/Installing-Arch-as-a-guest-with-UEFI-and-GPT.html
https://arch.icekylin.online/rookie/basic-install.html
https://www.reddit.com/r/archlinux/comments/b0ona0/vmtools_on_arch_linux_full_screen_or_resizing/